
Screaming Eagle, 2016, 1x150cl
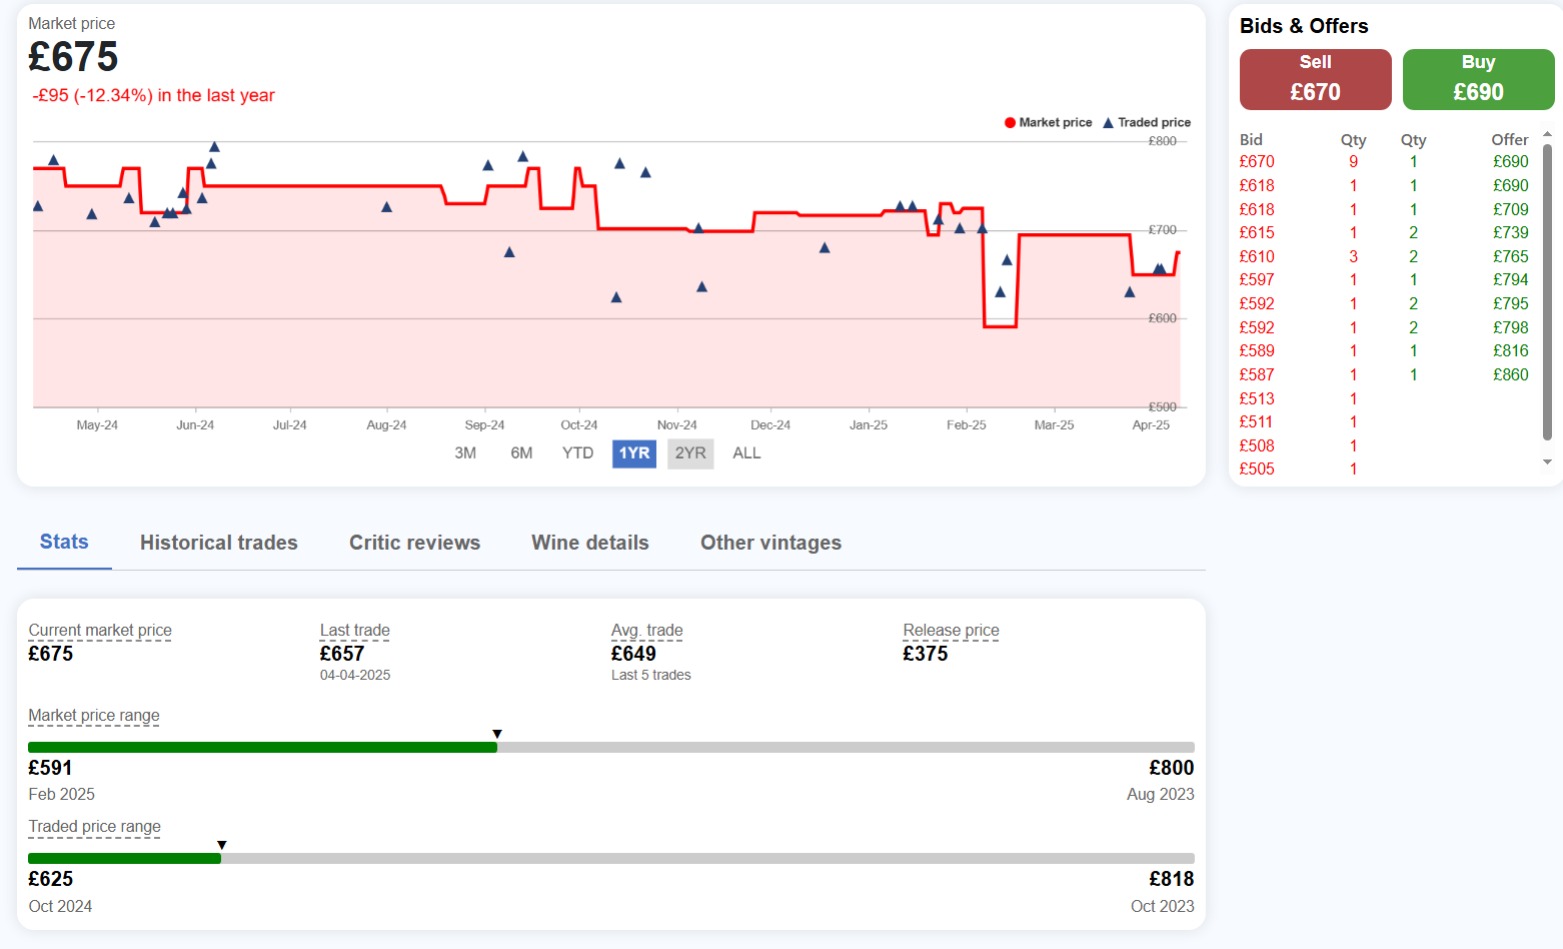
Market price
×The best available price you can buy the wine for on the secondary market.
Please click here for the full details and formulas used.
Last traded price
×The most recent price and date at which the wine was last traded.
Average trade
×The average price of the last 5 trades.
Release price
×The price that the wine was initially released on the market for.
Market price range
×Shows the highest and lowest market price since being listed on BordeauXchange. The arrow/green bar represents where the current price sits on that range.
Traded price range
×Shows the highest and lowest price a wine has traded for since being listed on BordeauXchange. The arrow/green bar represents where the last traded price sits on that range.
Distance from trade
×The difference between your price and the opposing bid or offer price.
Example:
You have placed an offer to sell for £1,000 and the highest bid is £800, the difference is 20%.
Price change
×The percentage change from the previous trade.
Order type
×Buy/Sell now
Buy or sell at the current bid/offer price on display. A trade will execute immediately.
Bid to buy / Offer to sell
Set the price you are willing to buy/sell at and your order will be added to the order book. If a matching bid/offer is placed, a trade will automatically execute and you will be notified.
Best order
×Is your bid or offer the highest/lowest of all.
Order book
×Order book is a real-time, electronic list of buy and sell orders, used to match buyers and sellers. It consists of bids (highest prices buyers will pay) and offers/asks (lowest prices sellers will accept).
Score vs Price chart
×Each dot represents a vintage of this wine. Its horizontal position shows the critic score; its vertical position shows the market price per bottle.
The green dashed line is the fair value line — the price you would expect a wine to fetch at each score level, based on how this producer's other vintages are priced.
Above the line = priced higher than the score alone would suggest (relatively expensive).
Below the line = priced lower than the score would suggest — a potential value opportunity.
The R-squared figure shows how strongly critic scores predict prices for this producer. Closer to 1.0 means scores are a reliable guide to value; closer to 0 means other factors — rarity, age, availability — are driving prices more than the score.
Fair Value chart
×This chart shows how much each vintage is priced above or below its fair value — the price the log-linear regression model predicts based on its critic score relative to other vintages of the same wine.
Green bars = priced below fair value (potentially underpriced relative to its score).
Red bars = priced above fair value (commanding a premium over what the score alone would suggest).
A bar near zero means the market is pricing this vintage very close to where the model expects it to sit.
Vintage Comparison
×Each line shows how the price of a single vintage has changed over time. Because vintages have very different starting prices, all lines are rebased to 0% at the start of the selected time window — so you are comparing performance, not price level.
A line rising above 0% means that vintage has appreciated in the selected period; a line falling below 0% means it has lost value.
Use the range buttons to change the time window. Click any vintage in the legend to show or hide it.
Producer Index
×A single line that tracks the average performance of all vintages of this producer combined. Each vintage is treated equally regardless of its price, so the index reflects how the producer as a whole has moved over time rather than being dominated by the most expensive bottles.
The index starts at 100 at the beginning of the selected time window. A reading of 120 means prices are, on average, 20% higher than they were at the start of that period.
Use the range buttons to zoom in on shorter periods — the index always resets to 100 at the start of whichever window you select.